Friday, May 29, 2015

Dad's Day Poster


We all want to make something really special and one of a kind for dad for Father's Day. Last June we made these SUPER RAD DAD posters for our beehive dads, they were a big hit in the studio and again at home. We use 12" x 18" matte board, you can also use any card stock or heavy weight paper. I love using  paper stencils, an easy hardware store find... they usually come in two sizes and I often mix them up and use both. Watercolor resist (oil pastel and watercolor paint) is a favorite technique that we use here to create these posters. 


Supplies
- stencils
- matte board
- pencil
- sharpie marker
- oil pastels
- watercolor paint and brushes
- paper towel


1.  Stencil your message with pencil and outline the letters with a sharpie. 

2.  Draw with oil pastels... play with color groups or patterns or just go nuts with lots of color.


3.  Paint over the oil pastel with the watercolor paint. The areas where you haven't used the oil pastel will absorb the paint and the areas with the pastel will resist it. Have a paper towel nearby to dab up the excess paint. Too much paint can dissolve the paper. 

4. Let your poster dry 


5. GO find your super rad dad !!

Friday, May 22, 2015

wood sculptures


wood pieces, sharpie marker, wood glue, watercolor paint

I love everything about these sculptures. 

Tuesday, May 19, 2015

The Nod Bookmobile


WE were honored to have these lovely ladies and 
The Nod Bookmobile visit the studio this weekend. 


The bus is loaded with fun games, toys, books, pillows, poofs,  rugs and tee pee. 
Jen and Tatiana work their magic to create the most inviting
 magical setting for children of all ages. 


Story time, campfire, s'mores, bag races and lots of super hero fun was had.
Little Golden books were sold to benefit Milk and Bookies, a non profit organization that donates books to children in need. 


           And they're off to spread more magic and wonder.
          
 So long Nod Bookmobile ! 

The Land of Nod 


Wednesday, May 13, 2015

6 o'clock shadows


     I couldn't resist the shadows and color bursts. 
I just dyed beehive tees for my friends
 from The Land of Nod. They'll be here Saturday 
on their Nod Bookmobile, we're very excited! 

Tuesday, May 5, 2015

Sunday, May 3, 2015

earth day terrariums


Inspiration hit while taking a terrarium workshop at the Sweet Paul Makerie at Terrain. Megan's instruction was fun, easy and infectious,
 I knew I wanted to make these with the beehive kids. 
 I prepped a  kid friendly version, collecting small plants, ferns, stones, bark and moss.
 I opted to use plastic liners versus glass, not my first choice 
but the kids could create their environments with ease, securing the plants, moss and small stones. We topped the terrariums off with colorful model magic butterflies, snails, salamanders, frogs, ponds and oodles of assorted bugs. 

Wednesday, April 29, 2015

ART studios for kids


Talk about inspiration, Meri Cherry has got it going on
 every single day, honestly cannot keep up with her! 
Honored to be included here in her pick of incredible inspired art studios for kids 

I love looking into spaces and creative places for children. Everyone has a different vision but we all mostly have the same mission.  When I first started summer ART, carrying Eli on my hip, I had classes in my kitchen, back porch and backyard - it was perfect. It almost doesn't matter about the space, it's the energy you bring to it. 
It's about the kids and they make the space. 
We moved beehive two years ago.  At the time, it was a sad day for us as we left our spacious studio with a cute store front. We've settled into our new home  and I LOVE it. It's small and efficient. Everything has its place, it's bright and cheery. It comes with incredible sunlight and a beautiful outdoor space. It's a space for kids. 
Below is Meri's outdoor art space which I am cuckoo over. 
I want to spend the afternoon in there with her and her girls making ART. 


Read more about art, kids, life here meri cherry blog.
Thank you Meri. 

Friday, April 24, 2015

INDIGO inspired quilts

This past winter I have had the opportunity to sew with a great group of children.  We've made pillows, wallets, tote and  drawstring bags, headbands and an assortment of garlands and holiday decorations.  
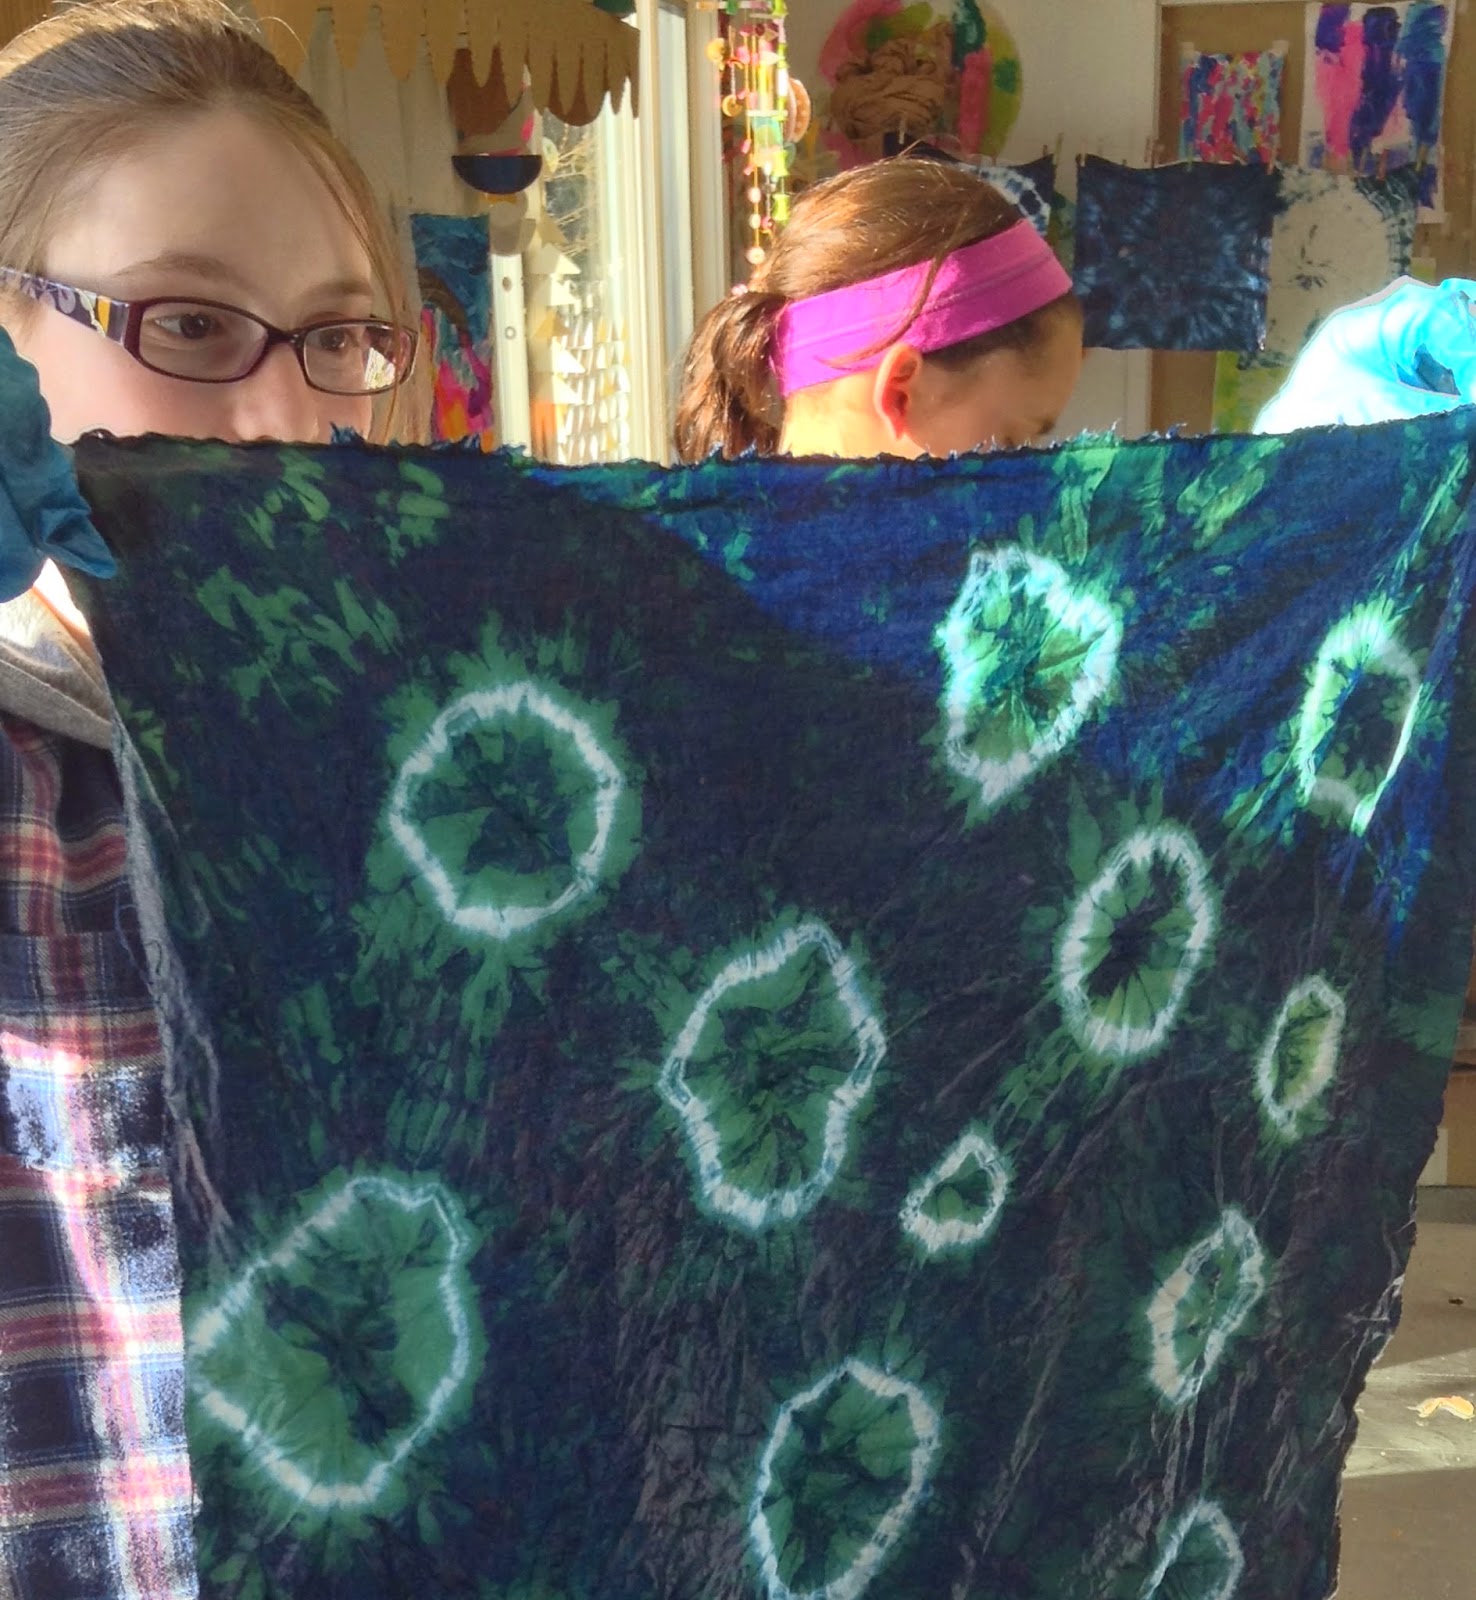
As I was looking for fabrics for a quilt project, I had the idea that they could create their own fabrics, making their quilts truly unique works of art.  I remembered that Susanna gave me an indigo dye kit (buy yours here) that I had wanted to experiment with. 
I LOVE it when things work out this way and I bought a boat load of crispy cotton muslin. 
We rolled, folded, twisted and tied up big squares of fabric. Everyone had four big pieces of rolled up tied up twisted muslin to dye. 
The process of the dye bath is a little tricky but we fell into the groove and cheered each other on as the results are truly magical. We spent two classes dying fabric for the quilts. The directions included in the kit are very specific and easy to follow. 
The sewing was a breeze.. everyone had 16 squares to work with, 4 squares from each of the 4 pieces of fabric they dyed. They then chose 4 pieces to match and sew together to make new larger squares, piecing and patch working together. 

 
bundling, tying, twisting muslin
                                                        squeezing fabric in dye bath
unwrapping first batch of indigo 


                                                                     hanging to dry


                                                        sewing squares of dyed indigo 

 We  are still working on the quilts, we've got batting and backs to tackle next. 
 I  couldn't wait any longer to share the process so far, I am so proud of these kids. 
 YAY INDIGO!   and thank you Susanna for the kit!