Saturday, January 16, 2016
Tuesday, January 12, 2016
Monday, January 11, 2016
Thursday, January 7, 2016
Tuesday, January 5, 2016
mouse house in the works
Another great on-the-road ART workshop.
This time we're creating mini mouse ART houses..
like our great mini ART HOUSE ARTbox !
I'll be posting weekly the progress of the process!
house / box
sharpie marker
oil pastel
watercolors
Saturday, January 2, 2016
studio set-ups
I know I'm not alone looking back over the year. I have oodles of images of children's ART from beehive classes, workshops and programs. And yes, the ART was incredible. I had nothing to do with that except present the materials + methods + maybe some good tunes. It's always about the kids and the energy created for and by them.
One thing I love to do is document the studio set-ups. The time before the paint flys and the energy is through the roof. It's a little nerve wracking but in a good follow your gut way with a variety of great materials, spectrum of colors and fun. It's like setting up for a party and your best friends are coming. It needs to be inviting and oozing with special excitement.
It can be simple. Simple as markers + stickers on small papers, colored pencils or watercolors on strips of white fabric.
It can be more involved. Like bookmaking, sewing or sculpture.
What ever it is you've got up your sleeve, pay attention to make great. So great that those small hands with big minds cannot resist the temptation to dive in and get lost.
It all matters.
Friday, January 1, 2016
Tuesday, December 29, 2015
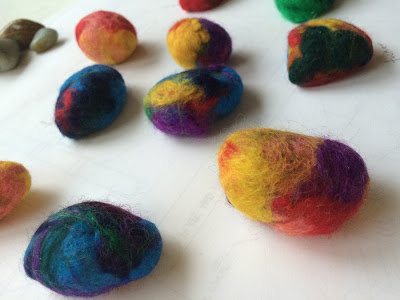
felted stones
I have a love for stones and have several collections here + there.
I also have a bag of wool, a great group of 4 year olds
and a bowl of suds. What could be better ?
I read up on a couple of DIYs, including one from a fav blog not so sham.
The process is insanely fun and perfect for little hands.
They love the soapy water and squishy wool.
From your wool roving,
pull out small amounts of wool from the top and lay down in a vertical direction. Just make your first layer of wool very fine.
pull out small amounts of wool from the top and lay down in a vertical direction. Just make your first layer of wool very fine.
Add a second layer crosswise.
And a third layer is laid down across that.
Making sure there are no thin spots or holes as you go.
We made nests for the stones to sit in and
wrapped the wool roving over the stones, completey covering them.
We then wrapped the wool covered stone in a small piece of cloth,
that will keep the wool in place to get you started.
As the wool begins to be felt, it will fit snug around the stone.
Unwrap the cloth and continue to gently roll stones in between palms.
We continued with the suds and smoothing the wool for a while.
I am sure there are dozens of ways to do this, but we kept it simple.
And that was the best part.
to make felted wool stones
wool roving
river stones
liquid soap
cheese cloth (we used hand wipes)
small bowl for water
Subscribe to:
Comments (Atom)


